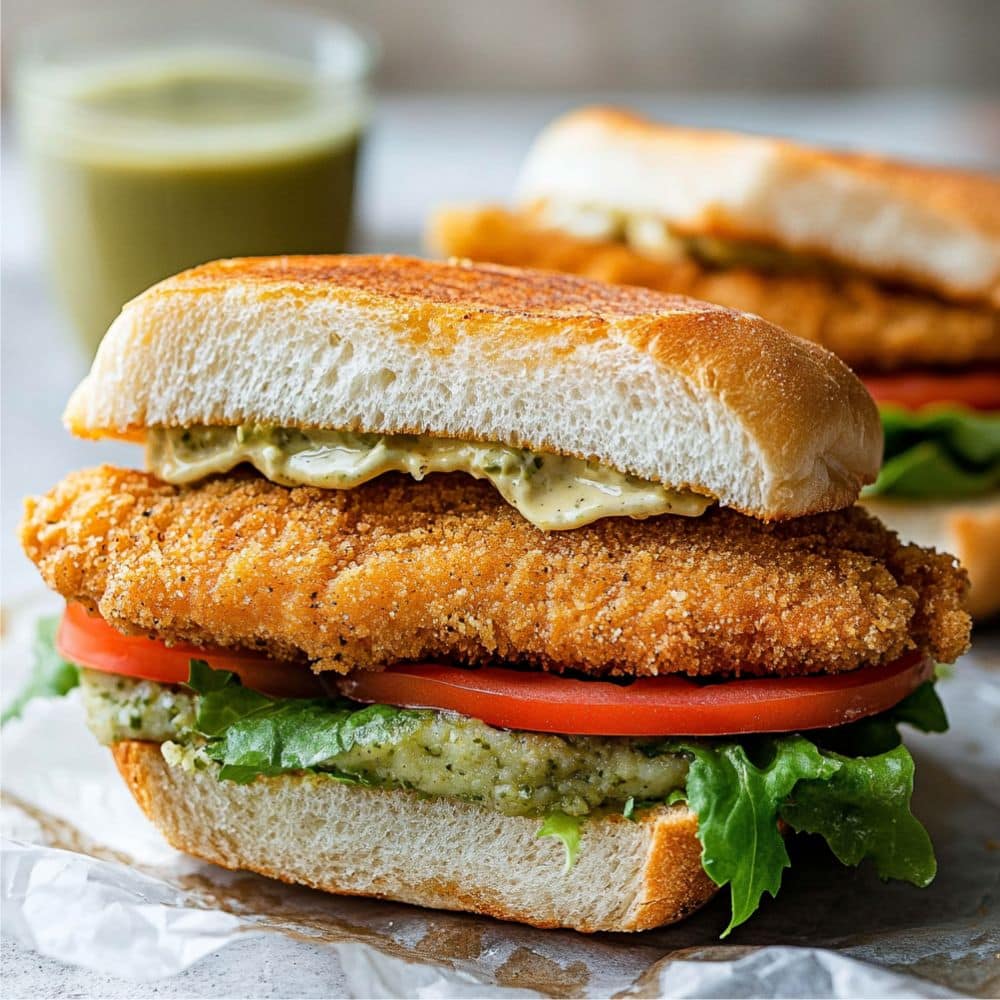
There’s something absolutely magical about biting into a perfectly crafted breaded chicken sandwich – the satisfying crunch of golden-brown coating giving way to tender, juicy chicken, all nestled between soft, toasted buns. This breaded chicken sandwich recipe has been my family’s go-to comfort food for over a decade, transforming ordinary weeknight dinners into something truly special. What makes this recipe stand out isn’t just its incredible flavor, but how surprisingly simple it is to achieve restaurant-quality results in your own kitchen.
Whether you’re planning tasty lunches for the week ahead, searching for satisfying dinner chicken sandwiches that please the whole family, or looking to expand your repertoire of breaded chicken dishes, this recipe delivers on all fronts. In just 30 minutes, you’ll have flavorful meals that rival any restaurant, without the hefty price tag or long wait times. Perfect for busy parents, college students, or anyone who appreciates the perfect balance of crispy exterior and succulent interior that makes chicken sandwiches irresistible.
Recipe Information
- Difficulty: Easy
- Preparation Time: 15 minutes
- Cooking Time: 15 minutes
- Total Time: 30 minutes
- Servings: 4 sandwiches
- Estimated Cost: Affordable
Ingredients for the Perfect Breaded Chicken Sandwich
For the Chicken:
- 4 boneless, skinless chicken breasts (about 6 oz each)
- 2 cups all-purpose flour
- 3 large eggs, beaten
- 2 cups panko breadcrumbs
- 1 cup regular breadcrumbs
- 2 teaspoons garlic powder
- 2 teaspoons onion powder
- 1 teaspoon paprika
- 1 teaspoon dried oregano
- 1 teaspoon salt
- ½ teaspoon black pepper
- ½ teaspoon cayenne pepper (optional, for heat)
- Vegetable oil for frying (about 2 cups)
For Assembly:
- 4 brioche burger buns or sandwich rolls
- 4 leaves butter lettuce
- 1 large tomato, sliced
- ½ red onion, thinly sliced
- 4 tablespoons mayonnaise
- 2 tablespoons Dijon mustard
- 4 slices cheese (optional – cheddar or Swiss work well)
Equipment and Utensils Required
- Large heavy-bottomed skillet or cast-iron pan
- 3 shallow dishes for breading station
- Meat mallet or rolling pin
- Instant-read thermometer
- Paper towels
- Wire cooling rack
- Tongs
- Sharp knife
- Cutting board
Recipe Preparation: Step-by-Step Instructions
Step 1: Prepare the Chicken
Place each chicken breast between two pieces of plastic wrap or parchment paper. Using a meat mallet or rolling pin, gently pound the chicken to an even ¾-inch thickness. This ensures uniform cooking and tender results. Season both sides of each breast with salt and pepper, then set aside for 10 minutes to allow the seasoning to penetrate.
Step 2: Set Up Your Breading Station
Create your three-station breading setup: In the first shallow dish, place the all-purpose flour. In the second dish, beat the eggs until well combined. In the third dish, mix together both types of breadcrumbs, garlic powder, onion powder, paprika, oregano, salt, pepper, and cayenne (if using). This seasoned breadcrumb mixture is the secret to achieving that perfect golden crust.
Step 3: Bread the Chicken
Working with one piece at a time, dredge each chicken breast first in flour, shaking off excess. Next, dip into the beaten eggs, ensuring complete coverage. Finally, press firmly into the seasoned breadcrumb mixture, coating both sides thoroughly. For extra crunch, you can double-dip by repeating the egg and breadcrumb steps. Place breaded chicken on a clean plate.
Step 4: Heat the Oil
In your large skillet, heat vegetable oil to 350°F (175°C). The oil should be about ½ inch deep – enough to come halfway up the chicken pieces. Use an instant-read thermometer to maintain proper temperature, as this is crucial for achieving crispy results without burning.
Step 5: Fry the Chicken
Carefully place 2 pieces of breaded chicken in the hot oil (don’t overcrowd). Fry for 4-5 minutes on the first side until golden brown, then flip and cook for another 3-4 minutes. The internal temperature should reach 165°F (74°C). Remove to a wire rack to drain excess oil and maintain crispiness.
Step 6: Prepare the Buns and Toppings
While the chicken rests, lightly toast the brioche buns until golden. Slice your tomatoes into ¼-inch thick rounds, and thinly slice the red onion. Mix mayonnaise and Dijon mustard in a small bowl for the perfect creamy-tangy spread.
Step 7: Assemble Your Masterpiece
Spread the mayo-mustard mixture on both sides of each toasted bun. Layer the bottom half with lettuce, followed by the crispy breaded chicken, tomato slices, and red onion. Add cheese if desired (the residual heat from the chicken will slightly melt it). Crown with the top bun and serve immediately.

Chef’s Tips and Variations
Pro Tips for Perfect Results:
- Temperature Control: Maintaining oil temperature is crucial. Too hot, and the coating burns before the chicken cooks through. Too cool, and you’ll get soggy, greasy results.
- Don’t Skip the Rest: Letting the breaded chicken rest for 5-10 minutes before frying helps the coating adhere better.
- Double Coating: For extra crispy results, repeat the egg and breadcrumb steps for a thicker crust.
Delicious Variations:
Transform this basic recipe into other breaded chicken dishes by experimenting with different seasonings. Add Italian herbs and parmesan for a Mediterranean twist, or try buttermilk in place of regular eggs for Southern-style flavor. For breaded chicken panini, use ciabatta bread and press in a panini maker for 3-4 minutes after assembly.
Make It Healthier:
For easy healthy dinner sandwiches, try baking the breaded chicken at 425°F for 20-25 minutes instead of frying, or use an air fryer at 380°F for 12-15 minutes, flipping halfway through.
Serving Suggestions:
These sandwiches pair beautifully with crispy sweet potato fries, coleslaw, or a simple side salad. For dinner ideas for grill enthusiasts, the chicken can also be finished on a preheated grill for added smoky flavor – just reduce the initial cooking time slightly.
Storage and Meal Prep
Leftover breaded chicken can be stored in the refrigerator for up to 3 days and reheated in a 350°F oven for 10-12 minutes to restore crispiness. For meal prep, you can bread the chicken up to a day ahead and store covered in the refrigerator. While these aren’t technically no cook sandwiches, the components can be prepared in advance for quick assembly later.
Nutrition Information (Per Sandwich)
- Calories: 680
- Protein: 42g
- Carbohydrates: 58g
- Fat: 28g
- Fiber: 3g
- Sodium: 920mg
Why This Recipe Works Every Time
The success of this breaded chicken sandwich lies in the combination of proper technique and quality ingredients. The dual breadcrumb mixture creates exceptional texture, while the seasoning blend ensures every bite is packed with flavor. Unlike many complicated recipes, this one delivers consistently impressive results that make it perfect for both casual family dinners and special occasions.
This recipe has become our family’s answer to restaurant cravings, proving that homemade can be better than takeout. The golden, crispy coating gives way to incredibly juicy chicken, while the fresh toppings add brightness and crunch. It’s comfort food at its finest – satisfying, delicious, and surprisingly achievable for home cooks of all skill levels.
Frequently Asked Questions
Can I make breaded chicken panini with this recipe?
Absolutely! Use the same breaded chicken but assemble with sturdy bread like ciabatta or sourdough. Press in a panini maker for 3-4 minutes until the bread is golden and the cheese (if using) is melted.
What are some other flavorful meals I can make with this technique?
This breading method works wonderfully for chicken tenders, cutlets, or even pork chops. You can also adapt the seasonings – try ranch seasoning mix, curry powder, or everything bagel seasoning for variety.
Can these be considered easy healthy dinner sandwiches?
Yes! Bake the breaded chicken instead of frying, use whole grain buns, and load up on fresh vegetables. You can also use chicken thighs for more flavor with minimal additional calories.
How do these compare to other dinner chicken sandwiches?
This recipe creates restaurant-quality results at home with better ingredient control. The homemade breading is fresher and more flavorful than many pre-made options, and you can customize the spice level to your preference.
Are there any no cook sandwich alternatives using this chicken?
While the chicken itself needs cooking, you can prepare it ahead and serve cold on sandwiches with fresh ingredients – perfect for picnics or lunch boxes!
If you love spicy, bold flavors, you’ll want to try these Buffalo Chicken Sliders — a fun twist on a classic sandwich with a kick
Print
Breaded Chicken Sandwich
- Prep Time: 15
- Cook Time: 15
- Total Time: 30
- Yield: 4 servings 1x
- Category: Main Course
- Method: Frying
- Cuisine: American
- Diet: None
Description
A delicious and easy-to-make breaded chicken sandwich with a crispy coating and juicy chicken, perfect for weeknight dinners.
Ingredients
- 4 boneless, skinless chicken breasts (about 6 oz each)
- 2 cups all-purpose flour
- 3 large eggs, beaten
- 2 cups panko breadcrumbs
- 1 cup regular breadcrumbs
- 2 teaspoons garlic powder
- 2 teaspoons onion powder
- 1 teaspoon paprika
- 1 teaspoon dried oregano
- 1 teaspoon salt
- ½ teaspoon black pepper
- ½ teaspoon cayenne pepper (optional)
- Vegetable oil for frying (about 2 cups)
- 4 brioche burger buns or sandwich rolls
- 4 leaves butter lettuce
- 1 large tomato, sliced
- ½ red onion, thinly sliced
- 4 tablespoons mayonnaise
- 2 tablespoons Dijon mustard
- 4 slices cheese (optional)
Instructions
- Prepare the chicken by pounding to an even ¾-inch thickness and seasoning with salt and pepper.
- Set up a breading station with flour, beaten eggs, and seasoned breadcrumbs.
- Bread each chicken breast, coating in flour, eggs, and breadcrumbs.
- Heat vegetable oil in a skillet to 350°F (175°C).
- Fry chicken for 4-5 minutes per side until golden brown and internal temperature reaches 165°F (74°C).
- Toast the brioche buns and prepare toppings while chicken rests.
- Assemble the sandwiches with mayonnaise, lettuce, chicken, tomato, onion, and cheese if desired.
Notes
Maintain oil temperature for best results, and allow chicken to rest before frying for a better coating. You can double coat the chicken for extra crunch.
Nutrition
- Serving Size: 1 sandwich
- Calories: 680
- Sugar: 5g
- Sodium: 920mg
- Fat: 28g
- Saturated Fat: 6g
- Unsaturated Fat: 20g
- Trans Fat: 0g
- Carbohydrates: 58g
- Fiber: 3g
- Protein: 42g
- Cholesterol: 200mg