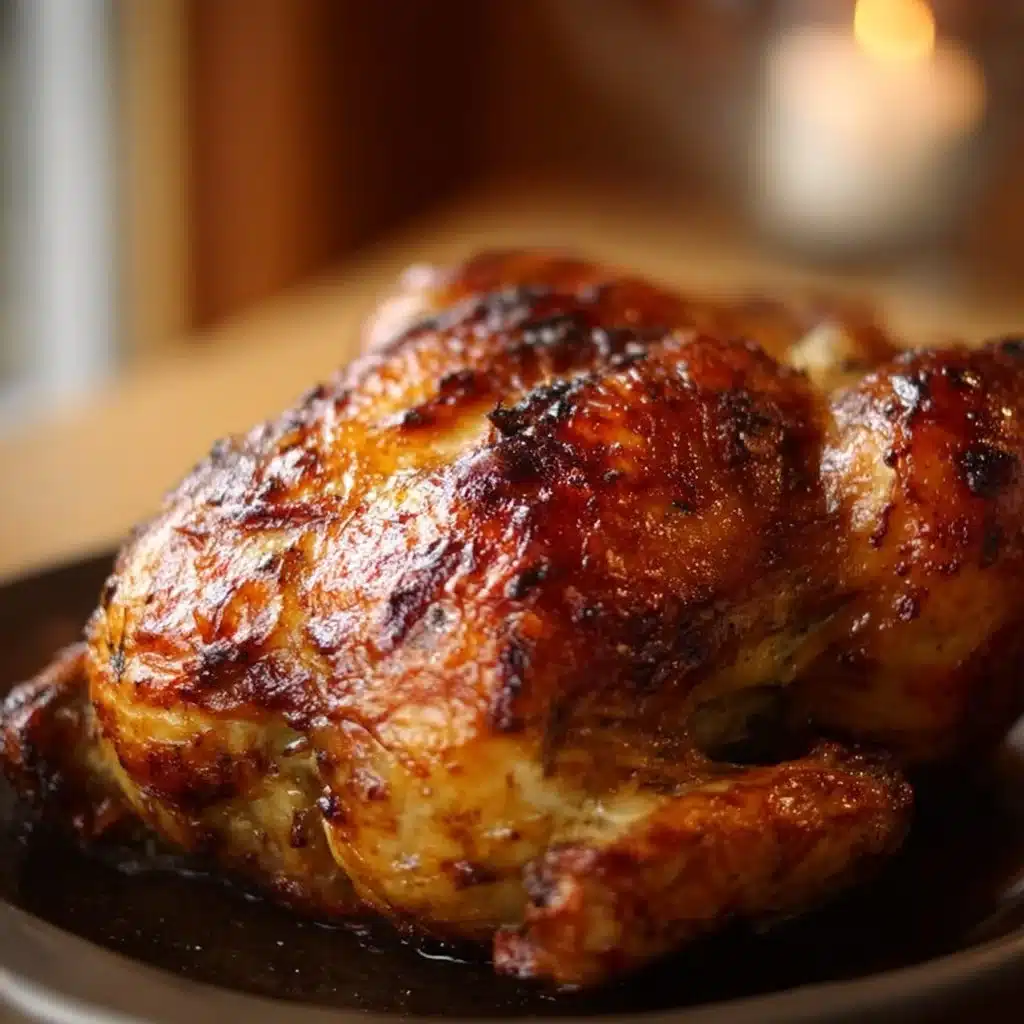
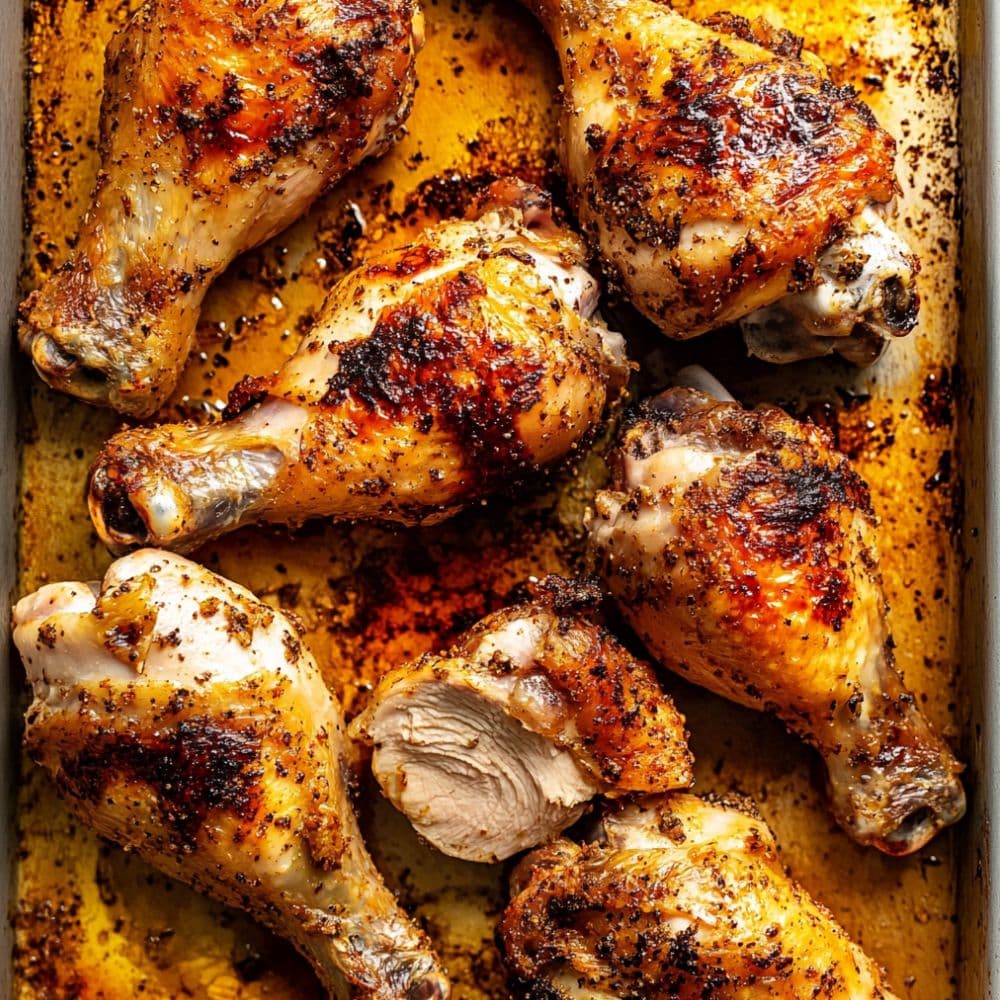
There’s something magical about the sizzle of chicken drumsticks hitting a hot oven, the way their skin transforms from pale and soft to golden and gloriously crispy. Roasted chicken drumsticks have been a cornerstone of comfort food for generations, and for good reason – they’re affordable, incredibly flavorful, and surprisingly versatile. Whether you’re planning a casual weeknight dinner or looking for crowd-pleasing party food, these perfectly seasoned drumsticks deliver every single time.
What makes this particular roasted chicken drumsticks recipe so special? It’s the perfect balance of simplicity and sophistication. Using just a handful of pantry staples, you’ll create tender, juicy meat with skin so crispy it practically crackles when you bite into it. This isn’t just another chicken drumsticks recipes oven method – it’s a foolproof technique that transforms humble ingredients into restaurant-quality results. The secret lies in the two-stage cooking process and a carefully crafted blend of seasonings that penetrate deep into the meat while creating that coveted golden exterior.
These drumsticks are perfect for busy families seeking an easy chicken drumstick dinner that doesn’t compromise on flavor. They’re also ideal for meal prep enthusiasts, as they reheat beautifully and taste even better the next day. From garlic butter variations to parmesan-crusted versions, this base recipe opens the door to countless ways to make chicken drumsticks that will keep your dinner rotation exciting and delicious.
Recipe Information
- Difficulty: Easy
- Preparation time: 15 minutes
- Cooking time: 45 minutes
- Resting time: 10 minutes
- Servings: Serves 4-6 people
- Estimated cost: Affordable
Ingredients for Perfect Roasted Chicken Drumsticks
- 3 pounds chicken drumsticks (about 12-14 pieces)
- 3 tablespoons olive oil
- 2 teaspoons garlic powder
- 2 teaspoons onion powder
- 2 teaspoons smoked paprika
- 1 teaspoon dried thyme
- 1 teaspoon dried oregano
- 1 teaspoon salt (or to taste)
- 1/2 teaspoon black pepper
- 1/2 teaspoon cayenne pepper (optional, for heat)
- 2 tablespoons fresh lemon juice
- 2 cloves fresh garlic, minced
- 2 tablespoons butter, melted (for garlic butter variation)
Equipment Required
- Large rimmed baking sheet
- Wire cooling rack (optional but recommended)
- Aluminum foil or parchment paper
- Large mixing bowl
- Meat thermometer
- Tongs for turning
- Small mixing bowl for seasonings
Recipe Preparation: Step-by-Step Instructions
- Preheat and Prepare: Preheat your oven to 425°F (220°C). Line a large rimmed baking sheet with aluminum foil for easy cleanup. If using a wire rack, place it on top of the foil-lined baking sheet – this helps air circulate around the drumsticks for even crispier skin.
- Pat Dry the Drumsticks: Remove chicken drumsticks from packaging and pat them completely dry with paper towels. This crucial step removes excess moisture that would otherwise prevent the skin from crisping properly. Don’t skip this step – it’s the difference between soggy and crispy skin.
- Create the Seasoning Blend: In a small bowl, combine garlic powder, onion powder, smoked paprika, thyme, oregano, salt, black pepper, and cayenne pepper if using. Mix thoroughly to create an even blend. This seasoning combination creates layers of flavor that complement the natural taste of chicken without overwhelming it.
- Season the Drumsticks: Place the dried drumsticks in a large mixing bowl. Drizzle with olive oil and fresh lemon juice, then add the minced fresh garlic. Toss thoroughly to ensure each drumstick is evenly coated with oil and aromatics.
- Apply the Dry Seasoning: Sprinkle the seasoning blend over the oiled drumsticks. Using your hands or tongs, massage the seasonings into every crevice of the drumsticks, ensuring complete coverage. The oil will help the seasonings adhere and create a flavorful crust during roasting.
- Arrange for Roasting: Place the seasoned drumsticks on the prepared baking sheet, ensuring they don’t touch each other. Proper spacing allows hot air to circulate freely, promoting even cooking and maximum crispiness. If your drumsticks are touching, use a second baking sheet.
- Initial High-Heat Roast: Place the baking sheet in the preheated oven and roast for 25 minutes without opening the oven door. This initial high-heat blast jumpstarts the crisping process and locks in the juices.
- Flip and Continue: After 25 minutes, carefully flip each drumstick using tongs. This ensures even browning on all sides. Return to the oven and roast for an additional 15-20 minutes until the internal temperature reaches 165°F (74°C) when measured with a meat thermometer.
- Final Crisping (Optional): For extra-crispy skin, turn on the broiler for the last 2-3 minutes of cooking time. Watch carefully to prevent burning – the skin should turn deep golden brown and look gloriously crispy.
- Rest Before Serving: Remove from oven and let the drumsticks rest for 5-10 minutes before serving. This resting period allows the juices to redistribute throughout the meat, ensuring maximum tenderness and flavor.

Chef’s Tips, Tricks, and Delicious Variations
The beauty of this roasted chicken drumsticks recipe lies in its versatility. Once you’ve mastered the basic technique, you can explore countless variations that will keep your family excited about dinner.
For Butter Chicken Drumsticks: After the initial 25-minute roast, brush each drumstick with melted butter mixed with minced garlic and fresh herbs like parsley or rosemary. This creates an incredibly rich, restaurant-style finish that’s absolutely irresistible.
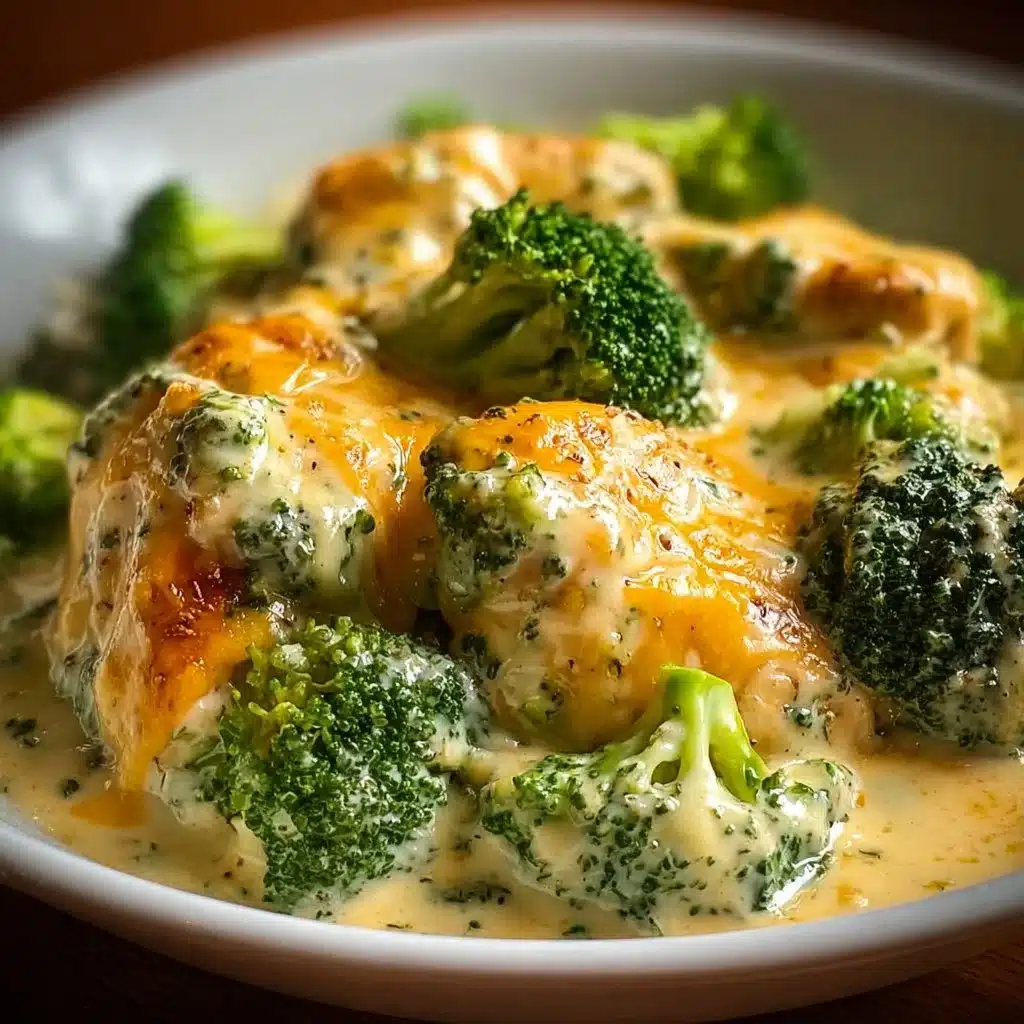
Parmesan Drumsticks Variation: During the last 10 minutes of cooking, sprinkle freshly grated Parmesan cheese over each drumstick. The cheese will melt and create a golden, savory crust that adds incredible depth of flavor. This variation transforms simple drumsticks into an elegant dinner worthy of special occasions.
Garlic Butter Chicken Drumsticks Enhancement: Create a compound butter by mixing softened butter with minced garlic, fresh herbs, and a pinch of salt. Rub this mixture under the skin before seasoning – it infuses the meat with rich, garlicky flavor while keeping it incredibly moist.
Professional Temperature Tips: Always use a meat thermometer to ensure perfect doneness. Insert it into the thickest part of the drumstick, avoiding the bone. The internal temperature should reach exactly 165°F (74°C) for food safety while maintaining juiciness.
Skin Perfection Secrets: For the crispiest skin possible, consider air-drying the seasoned drumsticks in the refrigerator for 2-4 hours before cooking. This extra step removes surface moisture and results in incredibly crispy, restaurant-quality skin.
Flavor Pairing Suggestions: These versatile drumsticks pair beautifully with roasted vegetables, creamy mashed potatoes, fresh coleslaw, or a simple green salad. For a complete chicken drumstick dinner, consider serving with garlic bread and roasted Brussels sprouts.
Storage and Reheating: Leftover drumsticks can be stored in the refrigerator for up to 4 days. To reheat while maintaining crispiness, place them in a 375°F oven for 10-15 minutes rather than using the microwave, which will make the skin soggy.
Meal Prep Magic: These drumsticks are excellent for meal prep. Cook a large batch on Sunday and use them throughout the week in salads, wraps, or as quick protein additions to grain bowls.
Nutrition Information
Per serving (2-3 drumsticks):
- Calories: 320-380
- Protein: 28-32g
- Carbohydrates: 2-3g
- Fat: 22-26g
- Fiber: 0-1g
- Sodium: 580-620mg
These drumsticks provide an excellent source of high-quality protein while remaining relatively low in carbohydrates, making them suitable for various dietary approaches including keto and low-carb eating plans.
Conclusion and Final Thoughts
This roasted chicken drumsticks recipe proves that extraordinary flavor doesn’t require complicated techniques or exotic ingredients. By focusing on proper preparation, smart seasoning, and optimal cooking methods, you can create drumsticks that rival those from your favorite restaurant – all from the comfort of your own kitchen.
The versatility of this recipe means you’ll never get bored with your chicken drumstick dinner rotation. From simple weeknight meals to impressive party platters, these drumsticks adapt beautifully to any occasion. The techniques you’ve learned here – proper drying, strategic seasoning, and two-stage cooking – will serve you well beyond this single recipe, improving all your future chicken cooking endeavors.
Whether you’re exploring chicken drumsticks recipes oven methods for the first time or you’re a seasoned cook looking to perfect your technique, this recipe delivers consistent, crowd-pleasing results every single time. The combination of crispy skin and juicy, flavorful meat makes these drumsticks an instant family favorite that you’ll find yourself making again and again.
Have you tried this recipe? I’d love to hear about your experience! Leave a comment below sharing your results, favorite variations, or any creative ways to make chicken drumsticks that you’ve discovered. Your feedback helps other home cooks create amazing meals and builds our community of food lovers.
Share the love by posting photos of your beautiful roasted drumsticks on social media – tag us so we can celebrate your cooking success! And don’t forget to check out our other chicken recipes for more inspiration and techniques that will elevate your home cooking game.
Frequently Asked Questions
Q: How do I know when my chicken drumsticks are fully cooked? A: The most reliable method is using a meat thermometer – the internal temperature should reach 165°F (74°C) when inserted into the thickest part of the drumstick, away from the bone. Visually, the juices should run clear, and the skin should be golden brown and crispy.
Q: Can I use this recipe for drumlets or other chicken pieces? A: Absolutely! This drumlets recipe works perfectly for chicken wings, thighs, or drumlets. Adjust cooking time based on size – smaller pieces like drumlets may need only 30-35 minutes total, while larger thighs might need 50-60 minutes.
Q: What are the best ways to make chicken drumsticks if I don’t have an oven? A: While oven roasting produces the crispiest results, you can adapt this seasoning blend for grilling, air frying, or even slow cooking. For grilling, cook over medium heat for 20-25 minutes, turning frequently. Air fryer cooking takes about 25 minutes at 380°F, flipping halfway through.
Q: How can I make garlic butter chicken drumsticks extra flavorful? A: For the ultimate garlic butter chicken drumsticks, brush the cooked drumsticks with a mixture of melted butter, minced fresh garlic, chopped parsley, and a squeeze of lemon juice immediately after removing them from the oven. The residual heat will melt the butter and infuse incredible flavor.
Q: Can I prepare chicken drumsticks recipes for dinner ahead of time? A: Yes! You can season the drumsticks up to 24 hours in advance and store them covered in the refrigerator. This actually improves flavor as the seasonings have more time to penetrate the meat. You can also fully cook them ahead of time and reheat in a 375°F oven for 10-15 minutes to restore crispiness.
What’s your favorite way to season chicken drumsticks? Share your creative variations in the comments below and help inspire other home cooks to try new flavors!
Print
Perfect Roasted Chicken Drumsticks
- Prep Time: 15 minutes
- Cook Time: 45 minutes
- Total Time: 70 minutes
- Yield: 4-6 servings 1x
- Category: Main Course
- Method: Roasting
- Cuisine: American
- Diet: Paleo
Description
Deliciously crispy roasted chicken drumsticks with tender, juicy meat, perfect for any occasion.
Ingredients
- 3 pounds chicken drumsticks (about 12–14 pieces)
- 3 tablespoons olive oil
- 2 teaspoons garlic powder
- 2 teaspoons onion powder
- 2 teaspoons smoked paprika
- 1 teaspoon dried thyme
- 1 teaspoon dried oregano
- 1 teaspoon salt (or to taste)
- 1/2 teaspoon black pepper
- 1/2 teaspoon cayenne pepper (optional)
- 2 tablespoons fresh lemon juice
- 2 cloves fresh garlic, minced
- 2 tablespoons butter, melted (for garlic butter variation)
Instructions
- Preheat your oven to 425°F (220°C) and line a baking sheet with aluminum foil.
- Pat the chicken drumsticks dry with paper towels to ensure crispy skin.
- In a small bowl, combine garlic powder, onion powder, smoked paprika, thyme, oregano, salt, black pepper, and cayenne pepper.
- In a large mixing bowl, combine the drumsticks with olive oil, lemon juice, and minced garlic, then toss well.
- Sprinkle the seasoning blend over the drumsticks and massage it in for even coverage.
- Arrange the drumsticks on the baking sheet, ensuring they are spaced apart.
- Roast in the preheated oven for 25 minutes without opening the door.
- Carefully flip each drumstick using tongs and roast for an additional 15-20 minutes until the internal temperature reaches 165°F (74°C).
- For extra crispiness, broil for the last 2-3 minutes, watching closely.
- Let the drumsticks rest for 5-10 minutes before serving.
Notes
These drumsticks are perfect for meal prep and reheat beautifully. Try variations like garlic butter or parmesan crust for added flavor.
Nutrition
- Serving Size: 2-3 drumsticks
- Calories: 350
- Sugar: 1g
- Sodium: 600mg
- Fat: 24g
- Saturated Fat: 7g
- Unsaturated Fat: 12g
- Trans Fat: 0g
- Carbohydrates: 3g
- Fiber: 0g
- Protein: 32g
- Cholesterol: 100mg